Many people view bicycles as a leisurely way to get around town, but they can be more. By making appropriate modifications to your bike, you can transform it into an adventurous mode of transportation.
Making a bike more aggressive can be done in a few ways. One way is to change the tire pressure. Lowering the pressure makes the bike more agile and able to handle better. It also gives it more traction, which is good for acceleration and cornering. Another way to make a bike more aggressive is to change the suspension settings. Making the suspension stiffer will make the bike more stable and less likely to bounce around.
Adding more aggressive bike components to a mountain bike is one of the most effective hacks. There are free ride, downhill, and enduro-oriented parts available for you to review. By doing so, your bike will feel like a nimble but aggressive trail bike that’s ready for enduro and park riding.
With heavy-duty downhill tires and 820mm-wide handlebars, the bike will gain weight, but it will feel more comfortable as it descends.
7 Simple Tips And Tricks To Make Your Bike More Aggressive
You can modify your bike in a few simple ways to make it more aggressive and suitable for track days or racing.

These bikes emphasize road bike-like speed and efficiency without the aggressive position and aggressive riding style, with lightweight frames, high-performance components, and slick tires for a more accessible ride position.
Furthermore, you can be in an aggressive position with a neutral spine, or you could be in an upright position.
You can compare your bike with an endurance bike and a performance bike. So, your current bike probably is more in an aggressive riding position. Endurance bikes are usually designed for predictable handling and upright riding positions.
1. Cockpit
If you look at the horns or handlebars of a mountain bike, you can see its lack of aggression. Making a change doesn’t make much money, and it’s a worthwhile place to start.
Although it’s easy to go too broad nowadays, wider handlebars add stability to a bike’s descending capabilities. With wider handlebars, the rider and their weight are positioned lower into the bike for a more balanced stance that complements the geometry of a mountain bike.
A riser bar or handlebars with a higher rise is another way to set up an aggressive cockpit. In general, trail bikes have handlebars with about 10-30mm of rising. You will be more comfortable when descending steep trails if you add a set of bars that have 40, 50, or 60mm of rising.
For a more responsive ride and a modern cockpit look, you can pair them with a shorter stem, between 40-60mm.
2. Geometry
An angled headset can be used to tweak a mountain bike’s handling on aggressive terrain. A half-or full-degree angle in the headset can alter the bike’s geometry.
So, the best bike’s performance and wide range distance covering capacity are measured by better frame size that affects more geometry.
In addition to a slacker head angle, the seat angle will also become steeper for more stability. The bottom bracket height has the potential to be lowered as well, so it’s generally a win for both.
So, Find out if an angle set would be appropriate for your mountain bike with aggressive geometries.
3. Tires
Making everything wider isn’t the answer if you want an aggressive mountain bike. Starting with the handlebars, tires, and wheels will do the trick.
The tires need to be replaced as soon as they wear out, so wider tires are an easy fix. Compared to a narrow tire, a 2.3- or 2.4-inch tire at the rear and a 2.5- or 2.6-inch tire at the front offer more traction and increased confidence on technical terrain and through corners.
If you are riding a cross-country bike, 2.3 and 2.4-inch wider tires would be a valuable upgrade for a more aggressive setup without adding too much weight. It’s too necessary to make them aggressive tire treads.
Consider installing a “full enduro” and installing a 2.6″ upfront and a 2.4″ on the rear for a trail bike. If set up correctly with the right size wheels, it’ll probably add some weight but reduce punctures.
4. Wheels
You wouldn’t want to put 2.8-inch tires on a set of 22mm internal width rims, would you? Find out why a tire and rim width is critical in our tire and rim widths guide.
By using the guide above, it will be easy to have a look at how you are currently setting things up. You will also see how it can be modified to fit into the next, broader category.
It is also worth noting that a set of wider rims is another upgrade that may be a bit more difficult to make than a set of brand-new tires. When a wider rim and tire are combined, the tread pattern on the tire expands and creates a larger area of traction.
The good news is that you don’t have to break the bank to get a high-quality set of alloy rims. A perfect example of this would be the Stan’s Flow MkIII alloy rims, an enduro-ready rim available for about $100 per piece.
In addition to its dimensions and width, its internal width of 31mm makes it suitable for use with wide tires.
Before purchasing, it is imperative to ensure that the broader rim and tires fit with your existing frame and fork.
5. Tire Inserts
Would you like to upgrade to more aggressive tires and wheels? Adding inserts to your tires can help you achieve this. When an insert is installed into a wheelset or even just the rear wheel alone, the risk of punctures or snake bites in a tire is reduced. It also allows the rider to run a lower air pressure.
Compared to other mountain bike products, tire inserts are also relatively inexpensive.
It costs between $75 and $85 to line a tire with AirLiners, but other liners like Huck Norris and Cush Core vary in price.
Although liners add weight, they may be worth it if they give you more confidence and reduce flats.
6. Suspension
Getting this right can be tricky. Riders can make a few adjustments to the suspension travel for more aggressive suspension setups without affecting the geometry.
The travel of the front end of a mountain bike can now be changed without significantly affecting the geometry or handling. According to most bike brands, adding a fork with 10mm of travel is not a big deal.
It’s still possible to get away with adding a fork with 10mm additional travel, even though it’ll slacken the head and seat angles just a bit and raise the bottom bracket just a little bit.
Forks with air springs can also be converted to coil springs. Adding coils will increase small bump compliance while adding a bit of weight.
Similarly, rear shocks work the same way. The coil-sprung suspension has become more popular in the last couple of years, and trail bikes can now be equipped with coil suspension.
As the bike’s climbing ability will be diminished by using a coil-sprung rear shock, air shocks are more progressive and stay longer at the top of their travel.
Moreover, the descending benefits will be appreciated once the correct tune is found on a coil shock.
7. Dropper Post
Many people have switched to dropper posts by now, but if you haven’t, don’t delay! Using this upgrade, mountain bike rides will be dramatically improved.
Dropper posts are also affordable at this time. PNW Components’ $200 coil-sprung dropper post was recently tested by Jeff Barber, which looks like a reliable and affordable choice. It was also noticeably better for small bumps than an air-sprung dropper post.
Kind Shock makes a few dropper posts among other affordable options, and its entry-level ETen retails for about $100.
FAQs
Why Is Geometry Significant?
Creating the right frame for your body is the primary Goal of road bicycles. You will become aware of how a bicycle’s geometry affects how it feels on the bike as time moves on.
There are two main parts of a road bike: the frame, which holds everything together, and the wheels, which hold the pedals. The length, seat tube angle, chainstays, top tube, and bottom bracket affect how the bike fits.
How Upright Or Aggressive Is A Bike Design?
The frame design will affect the amount of space between the wheels on the ground -It is easier to turn a bike upside down and easier to ride if it is not very upright -The more upright it is, the less comfortable it is to ride -The style of riding usually dictates bike designs.
Which Bike Frame Material Is Best?
Frame material should be chosen based on the intended use of the bike. Aluminum and titanium frames are lightweight, but they can be more expensive than steel frames.
Steel frame bicycles, the most common type of bike in the U.S., are relatively inexpensive. For bikes intended for recreational use, consider a steel frame. For competition bicycles, steel frames are lighter and stiffer than aluminum frames.
What Is The Goal Of Making Bikes More Aggressive?
They’re primarily designed for use on rough road surfaces and long-distance rides, but they’re also suitable for commuting.
It can go off-road and explore rough terrain and even some dirt and gravel.
What Does An Aggressive Bike Mean?
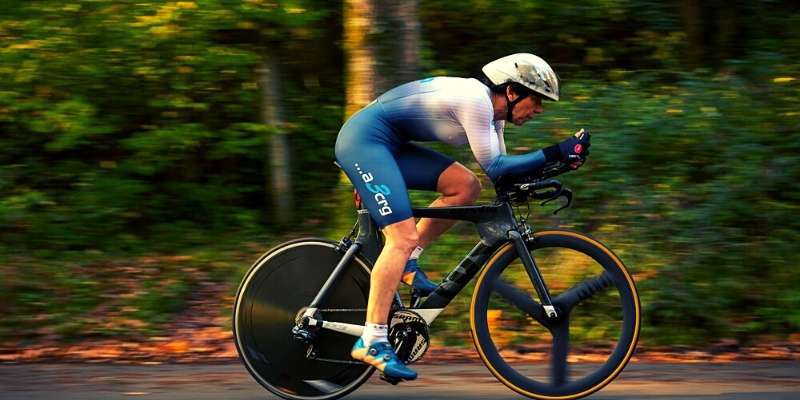
Aggressive geometry bikes tend to have short head tubes and steeper frame angles. The former puts the rider into a more streamlined position (lower head and flat back), whereas the latter creates a shorter wheelbase, resulting in quicker handling.
How Do I Know If My Bike Is Upright?
The distance from each bike’s stack and reaching a point along a given path is determined by that bike’s steering axis. The length of the distance determines whether the bike is somewhat upright or aggressive.
What Does Aggressive Riding Position Mean?
Aggressive geometry lowers your upper body for aerodynamics, and the bikes tend to favor twitchy handling characteristics. Relaxed geometry puts you in a more upright position, and the bike is designed to feel more stable at high speeds.
How Far Should Handlebars Be From Saddle?
The handlebar’s top should be about 5-6 cm below the saddle’s midpoint for a performance road position. For a recreational road bike position, the top of the handlebar should be level with, or slightly below, the mid-point of the saddle.
Therefore, there are a few simple things mentioned above you can do to make your bike more aggressive.


